[iOS프로그래밍기초] 9주차
[iOS프로그래밍기초] 9주차
- Do it! 스위프트로 아이폰 앱 만들기 입문, 송호정, 이범근 저,이지스퍼블리싱, 2023년 01월 20일
- https://www.yes24.com/Product/Goods/116918114
- https://github.com/doitswift/example
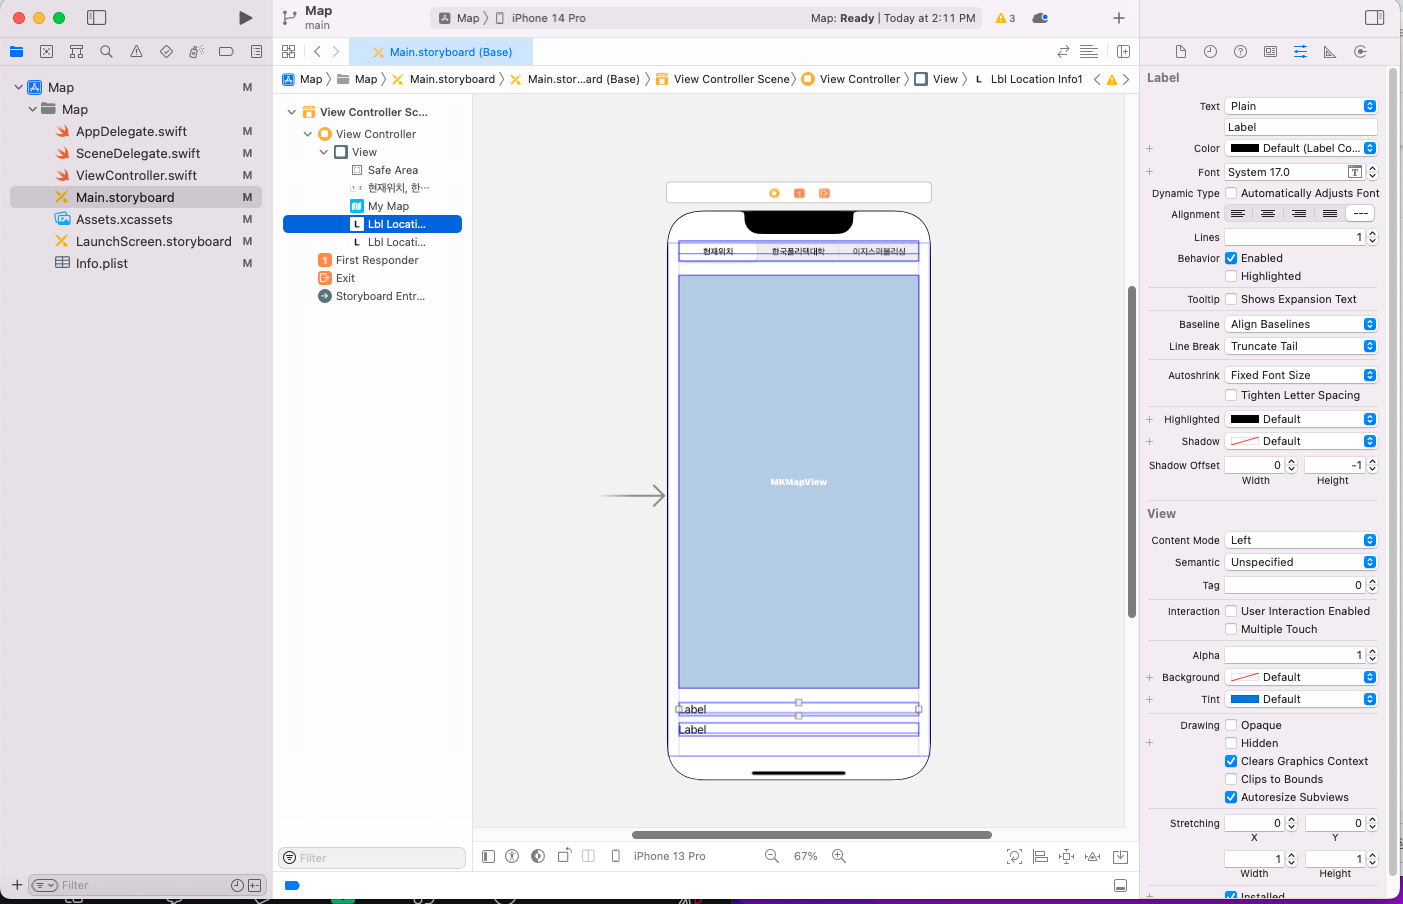
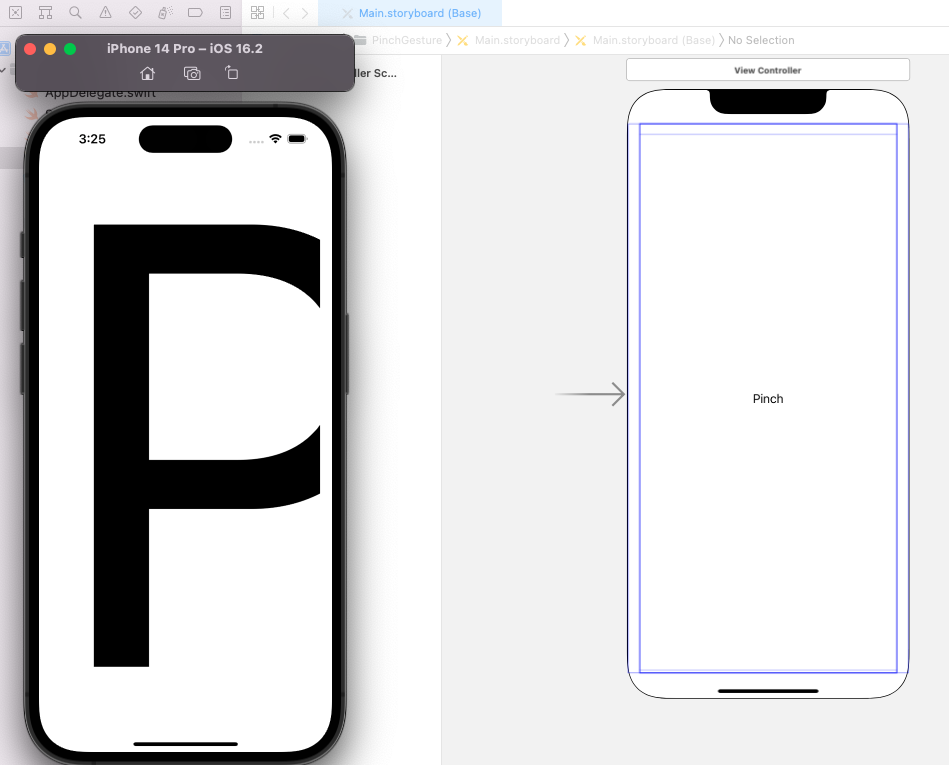
프로젝트를 맨 처음 열게 되면 Main.storyboard 를 열어서 확인한다.
어떤 요소인지 확인을 하고 싶으면 오른쪽에서 이름 확인.
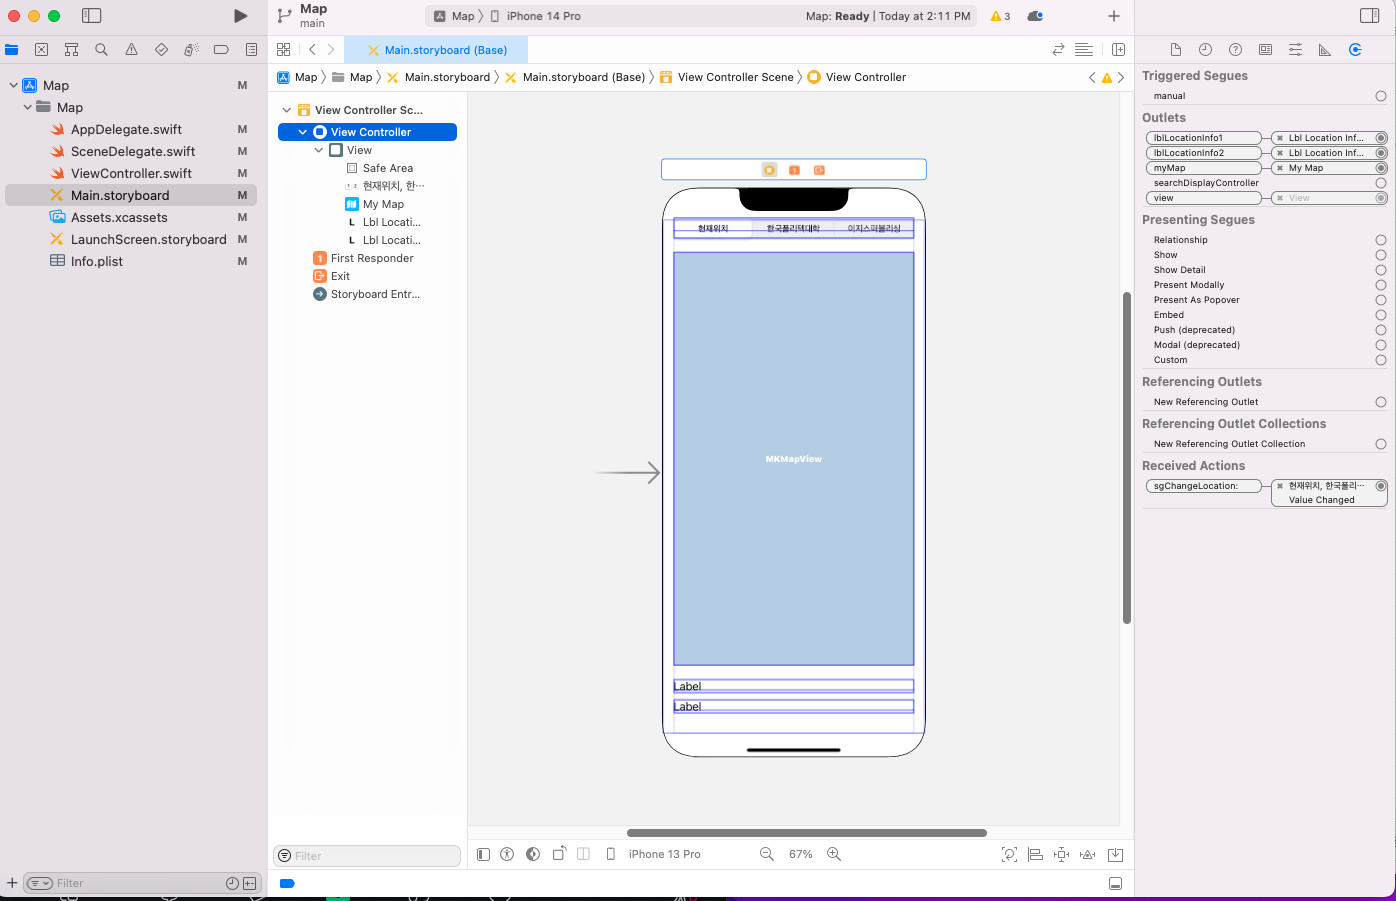
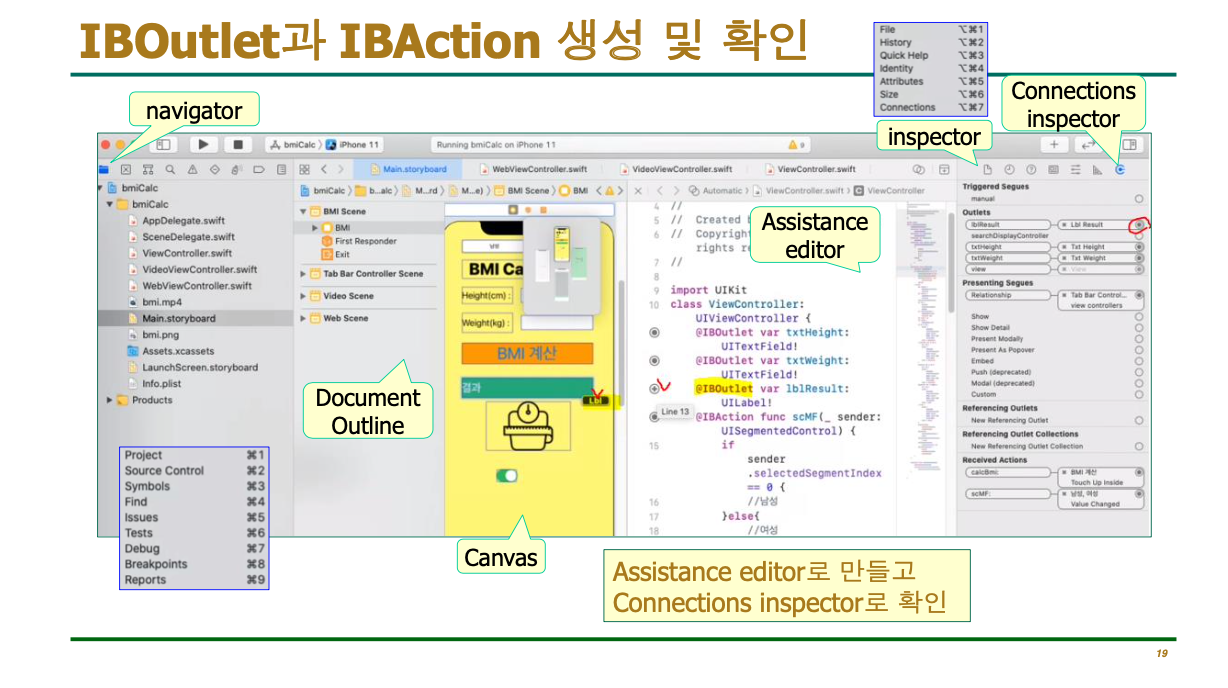
그 다음으로는 View controller 를 클릭하여 오른쪽 메뉴의 맨 오른쪽 옵션을 눌러서 커넥션스 인스펙터를 확인한다.
아울렛이 어떻게 연결되어있는지 알 수 있다.
alt 키를 누르고 드래그하면 지도를 확대할 수 있다.
프리웨이 드라이브를 선택한다
//
//  ViewController.swift
//  Map
//
//  Created by BeomGeun Lee on 2021
//

import UIKit // UIKit 프레임워크 가져오기 (UI 구성 요소를 위한 프레임워크)
import MapKit // MapKit 프레임워크 가져오기 (지도 관련 기능을 위한 프레임워크)

class ViewController: UIViewController, CLLocationManagerDelegate { // UIViewController를 상속받고 CLLocationManagerDelegate 프로토콜을 준수하는 ViewController 클래스 정의

    @IBOutlet var myMap: MKMapView! // 스토리보드에서 연결된 MKMapView 아울렛
    @IBOutlet var lblLocationInfo1: UILabel! // 스토리보드에서 연결된 UILabel 아울렛 (위치 정보 표시)
    @IBOutlet var lblLocationInfo2: UILabel! // 스토리보드에서 연결된 UILabel 아울렛 (상세 위치 정보 표시)

    let locationManager = CLLocationManager() // 위치 관리자를 위한 CLLocationManager 인스턴스 생성

    override func viewDidLoad() { // 뷰가 로드된 후 호출되는 메서드
        super.viewDidLoad() // 상위 클래스의 viewDidLoad 호출
        // Do any additional setup after loading the view.
        lblLocationInfo1.text = "" // lblLocationInfo1의 텍스트 초기화
        lblLocationInfo2.text = "" // lblLocationInfo2의 텍스트 초기화
        locationManager.delegate = self // 위치 관리자 델리게이트를 현재 클래스(ViewController)로 설정
        locationManager.desiredAccuracy = kCLLocationAccuracyBest // 위치 정확도 설정 (최고 정확도)
        locationManager.requestWhenInUseAuthorization() // 앱이 사용 중일 때 위치 권한 요청
        locationManager.startUpdatingLocation() // 위치 업데이트 시작
        myMap.showsUserLocation = true // 지도에서 사용자 위치 표시
    }

    func goLocation(latitudeValue: CLLocationDegrees, longitudeValue : CLLocationDegrees, delta span :Double) -> CLLocationCoordinate2D { // 위치 이동을 위한 메서드
        let pLocation = CLLocationCoordinate2DMake(latitudeValue, longitudeValue) // 주어진 위도 및 경도로 CLLocationCoordinate2D 객체 생성
        let spanValue = MKCoordinateSpan(latitudeDelta: span, longitudeDelta: span) // 줌 레벨을 설정하기 위한 MKCoordinateSpan 객체 생성
        let pRegion = MKCoordinateRegion(center: pLocation, span: spanValue) // 중심과 줌 레벨로 MKCoordinateRegion 객체 생성
        myMap.setRegion(pRegion, animated: true) // 지도의 영역을 설정하고 애니메이션 효과 적용
        return pLocation // 생성된 위치 반환
    }

    func setAnnotation(latitudeValue: CLLocationDegrees, longitudeValue : CLLocationDegrees, delta span :Double, title strTitle: String, subtitle strSubtitle:String) { // 주석 추가를 위한 메서드
        let annotation = MKPointAnnotation() // MKPointAnnotation 객체 생성
        annotation.coordinate = goLocation(latitudeValue: latitudeValue, longitudeValue: longitudeValue, delta: span) // 주어진 위치로 이동
        annotation.title = strTitle // 주석 제목 설정
        annotation.subtitle = strSubtitle // 주석 부제목 설정
        myMap.addAnnotation(annotation) // 지도에 주석 추가
    }

    func locationManager(_ manager: CLLocationManager, didUpdateLocations locations: [CLLocation]) { // 위치 업데이트 메서드
        let pLocation = locations.last // 가장 최근 위치 가져오기
        _ = goLocation(latitudeValue: (pLocation?.coordinate.latitude)!, longitudeValue: (pLocation?.coordinate.longitude)!, delta: 0.01) // 위치 이동
        CLGeocoder().reverseGeocodeLocation(pLocation!, completionHandler: { // 역 지오코딩을 통해 주소 정보 가져오기
            (placemarks, error) -> Void in // 클로저의 파라미터
            let pm = placemarks!.first // 첫 번째 지명 가져오기
            let country = pm!.country // 국가 정보 가져오기
            var address:String = country! // 주소 문자열 초기화
            if pm!.locality != nil { // 지역 정보가 있는 경우
                address += " " // 공백 추가
                address += pm!.locality! // 지역 이름 추가
            }
            if pm!.thoroughfare != nil { // 도로명 정보가 있는 경우
                address += " " // 공백 추가
                address += pm!.thoroughfare! // 도로명 추가
            }

            self.lblLocationInfo1.text = "현재 위치" // lblLocationInfo1에 현재 위치 텍스트 설정
            self.lblLocationInfo2.text = address // lblLocationInfo2에 주소 설정
            })

        locationManager.stopUpdatingLocation() // 위치 업데이트 중지
    }

    @IBAction func sgChangeLocation(_ sender: UISegmentedControl) { // 세그먼트 컨트롤의 값이 변경될 때 호출되는 메서드
        if sender.selectedSegmentIndex == 0 { // 첫 번째 세그먼트가 선택된 경우
            self.lblLocationInfo1.text = "" // lblLocationInfo1 초기화
            self.lblLocationInfo2.text = "" // lblLocationInfo2 초기화
            locationManager.startUpdatingLocation() // 위치 업데이트 시작
        } else if sender.selectedSegmentIndex == 1 { // 두 번째 세그먼트가 선택된 경우
            setAnnotation(latitudeValue: 37.751853, longitudeValue: 128.87605740000004, delta: 1, title: "한국폴리텍대학 강릉캠퍼스", subtitle: "강원도 강릉시 남산초교길 121") // 주석 추가
            self.lblLocationInfo1.text = "보고 계신 위치" // lblLocationInfo1에 텍스트 설정
            self.lblLocationInfo2.text = "한국폴리텍대학 강릉캠퍼스" // lblLocationInfo2에 텍스트 설정
        } else if sender.selectedSegmentIndex == 2 { // 세 번째 세그먼트가 선택된 경우
            setAnnotation(latitudeValue: 37.6314191, longitudeValue: 127.0548249, delta: 0.1, title: "인덕대학교", subtitle: "서울특별시 노원구 초안산로 12") // 주석 추가
            self.lblLocationInfo1.text = "보고 계신 위치" // lblLocationInfo1에 텍스트 설정
            self.lblLocationInfo2.text = "인덕대학교 " // lblLocationInfo2에 텍스트 설정
        }

    }

}
ㅍ
페이지 컨트롤러
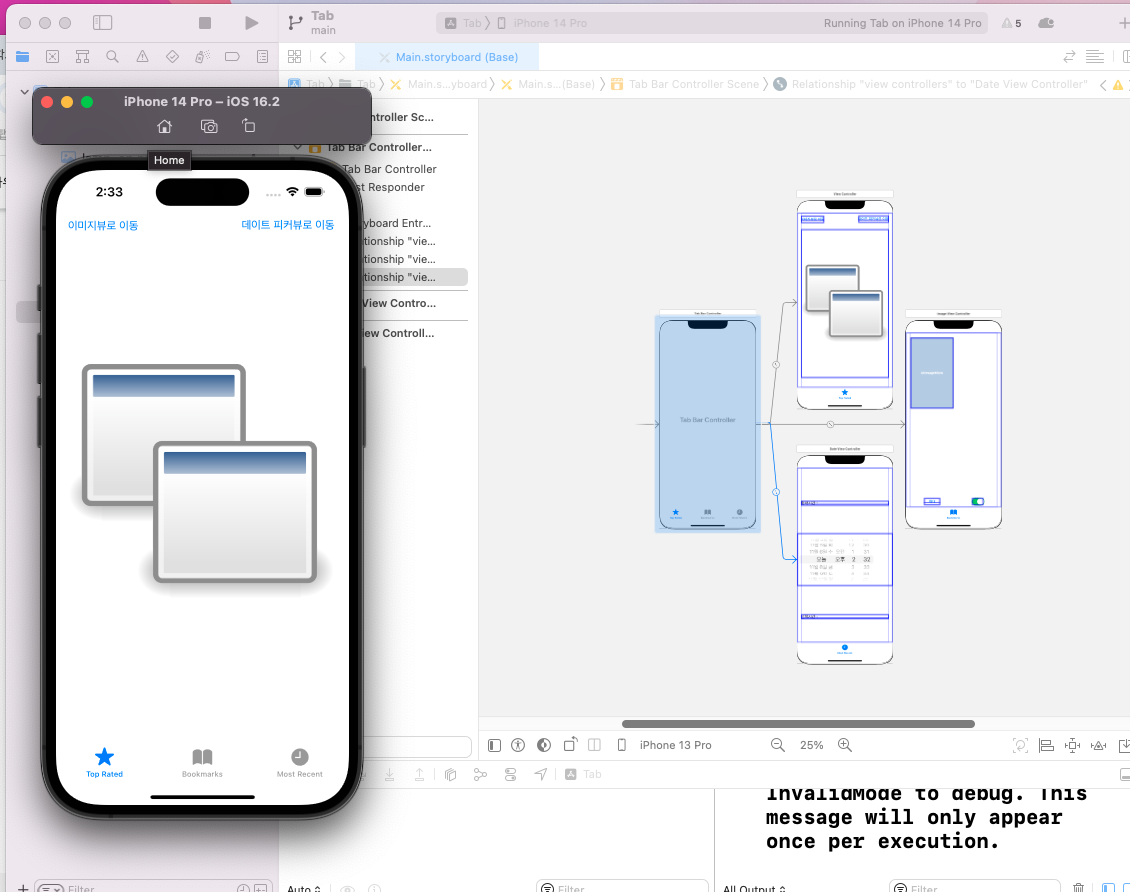
탭 바 컨트롤러 : 모바일에서 많이 쓰는 ui 이며 프로젝트 할 때도 많이 쓰인다
이전/다음 왔다갔다 하는 네비게이션 컨트롤러
자동으로 푸시 팝을 해주기 때문에 메모리 관리가 쉽다
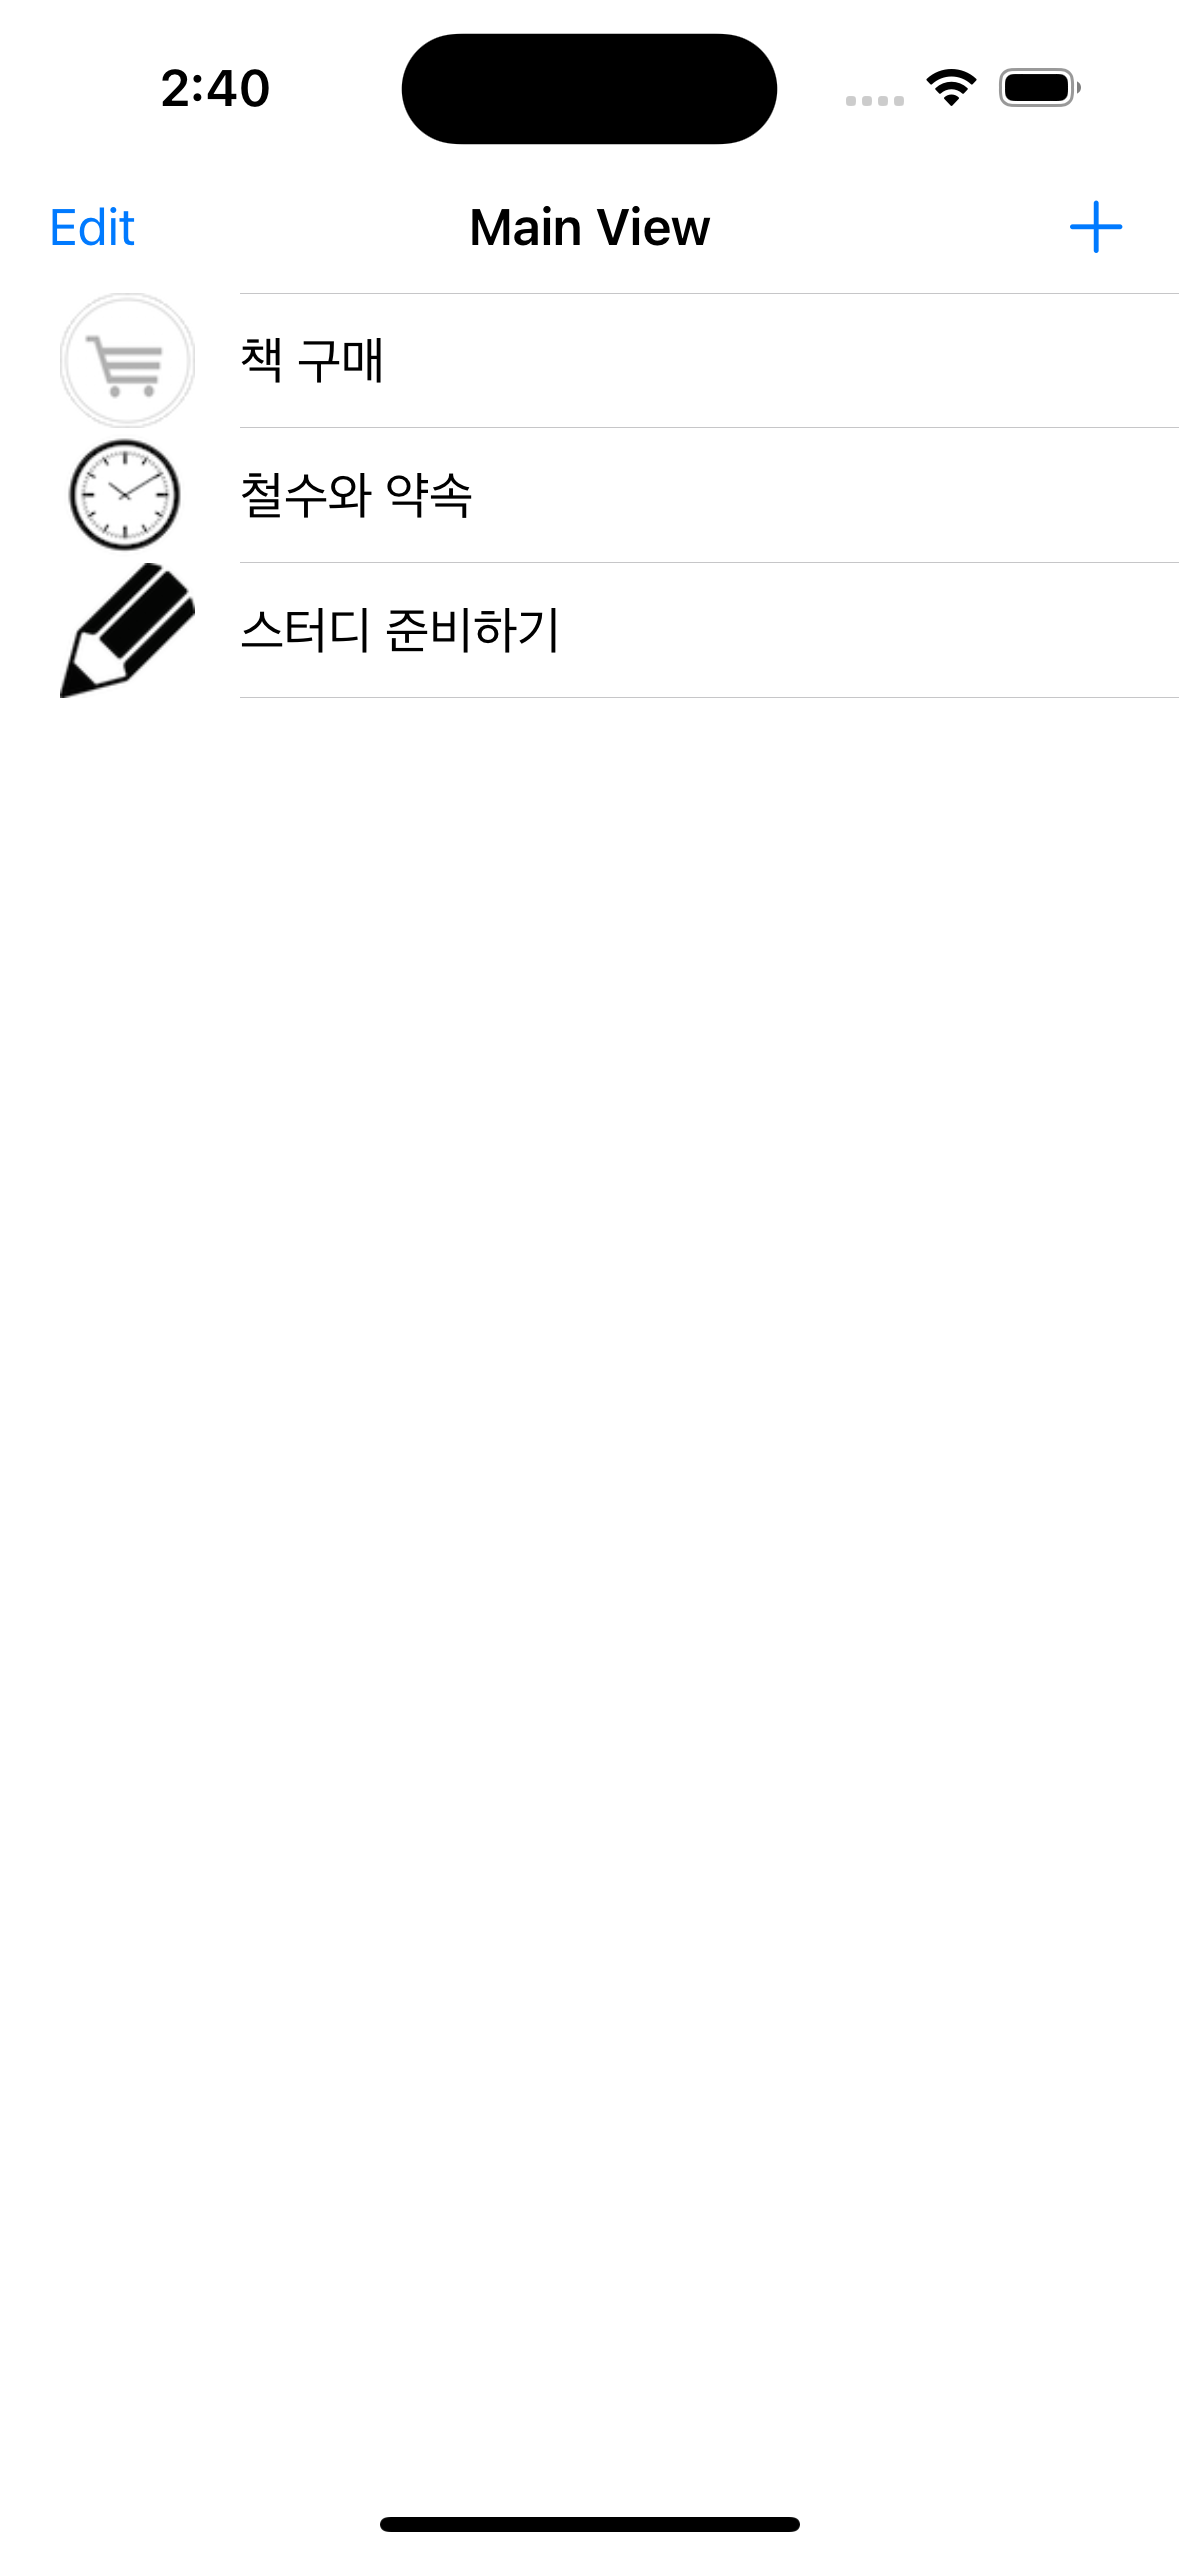
테이블 뷰
추가 삭제 가능. 간단한 메모장 앱
db 랑 연결이 되어 있지 않으면 껐다 키면 저장이 안 된다.
//
//  TableViewController.swift
//  Table
//
//  Created by BeomGeun Lee on 2021.
//

import UIKit

var items = ["책 구매", "철수와 약속", "스터디 준비하기"]
var itemsImageFile = ["cart.png", "clock.png", "pencil.png"]

class TableViewController: UITableViewController {

    @IBOutlet var tvListView: UITableView!

    override func viewDidLoad() {
        super.viewDidLoad()

        // Uncomment the following line to preserve selection between presentations
        // self.clearsSelectionOnViewWillAppear = false

        // Uncomment the following line to display an Edit button in the navigation bar for this view controller.
        self.navigationItem.leftBarButtonItem = self.editButtonItem
    }


    override func viewWillAppear(_ animated: Bool) {
            tvListView.reloadData()
    }


    // MARK: - Table view data source

    override func numberOfSections(in tableView: UITableView) -> Int {
        // #warning Incomplete implementation, return the number of sections
        return 1
    }

    override func tableView(_ tableView: UITableView, numberOfRowsInSection section: Int) -> Int {
        // #warning Incomplete implementation, return the number of rows
        return items.count
    }


    override func tableView(_ tableView: UITableView, cellForRowAt indexPath: IndexPath) -> UITableViewCell {
        let cell = tableView.dequeueReusableCell(withIdentifier: "myCell", for: indexPath)

        cell.textLabel?.text = items[(indexPath as NSIndexPath).row]
        cell.imageView?.image = UIImage(named: itemsImageFile[(indexPath as NSIndexPath).row])

        return cell
    }


    /*
    // Override to support conditional editing of the table view.
    override func tableView(_ tableView: UITableView, canEditRowAt indexPath: IndexPath) -> Bool {
        // Return false if you do not want the specified item to be editable.
        return true
    }
    */


    // Override to support editing the table view.
    override func tableView(_ tableView: UITableView, commit editingStyle: UITableViewCell.EditingStyle, forRowAt indexPath: IndexPath) {
        if editingStyle == .delete {
            // Delete the row from the data source
            items.remove(at: (indexPath as NSIndexPath).row)
            itemsImageFile.remove(at: (indexPath as NSIndexPath).row)
            tableView.deleteRows(at: [indexPath], with: .fade)
        } else if editingStyle == .insert {
            // Create a new instance of the appropriate class, insert it into the array, and add a new row to the table view
        }
    }

    override func tableView(_ tableView: UITableView, titleForDeleteConfirmationButtonForRowAt indexPath: IndexPath) -> String? {
        return "삭제"
    }


    // Override to support rearranging the table view.
    override func tableView(_ tableView: UITableView, moveRowAt fromIndexPath: IndexPath, to: IndexPath) {
        let itemToMove = items[(fromIndexPath as NSIndexPath).row]
        let itemImageToMove = itemsImageFile[(fromIndexPath as NSIndexPath).row]
        items.remove(at: (fromIndexPath as NSIndexPath).row)
        itemsImageFile.remove(at: (fromIndexPath as NSIndexPath).row)
        items.insert(itemToMove, at: (to as NSIndexPath).row)
        itemsImageFile.insert(itemImageToMove, at: (to as NSIndexPath).row)
    }


    /*
    // Override to support conditional rearranging of the table view.
    override func tableView(_ tableView: UITableView, canMoveRowAt indexPath: IndexPath) -> Bool {
        // Return false if you do not want the item to be re-orderable.
        return true
    }
    */


    // MARK: - Navigation

    // In a storyboard-based application, you will often want to do a little preparation before navigation
    override func prepare(for segue: UIStoryboardSegue, sender: Any?) {
        // Get the new view controller using segue.destination.
        // Pass the selected object to the new view controller.
        if segue.identifier == "sgDetail" {
            let cell = sender as! UITableViewCell
            let indexPath = self.tvListView.indexPath(for: cell)
            let detailView = segue.destination as! DetailViewController
            detailView.reciveItem(items[((indexPath! as NSIndexPath).row)])
        }
    }


}
이 소스를 이해하자 ! 그러면 잘하는 거임
카카오톡 채팅방이 다 테이블이다...
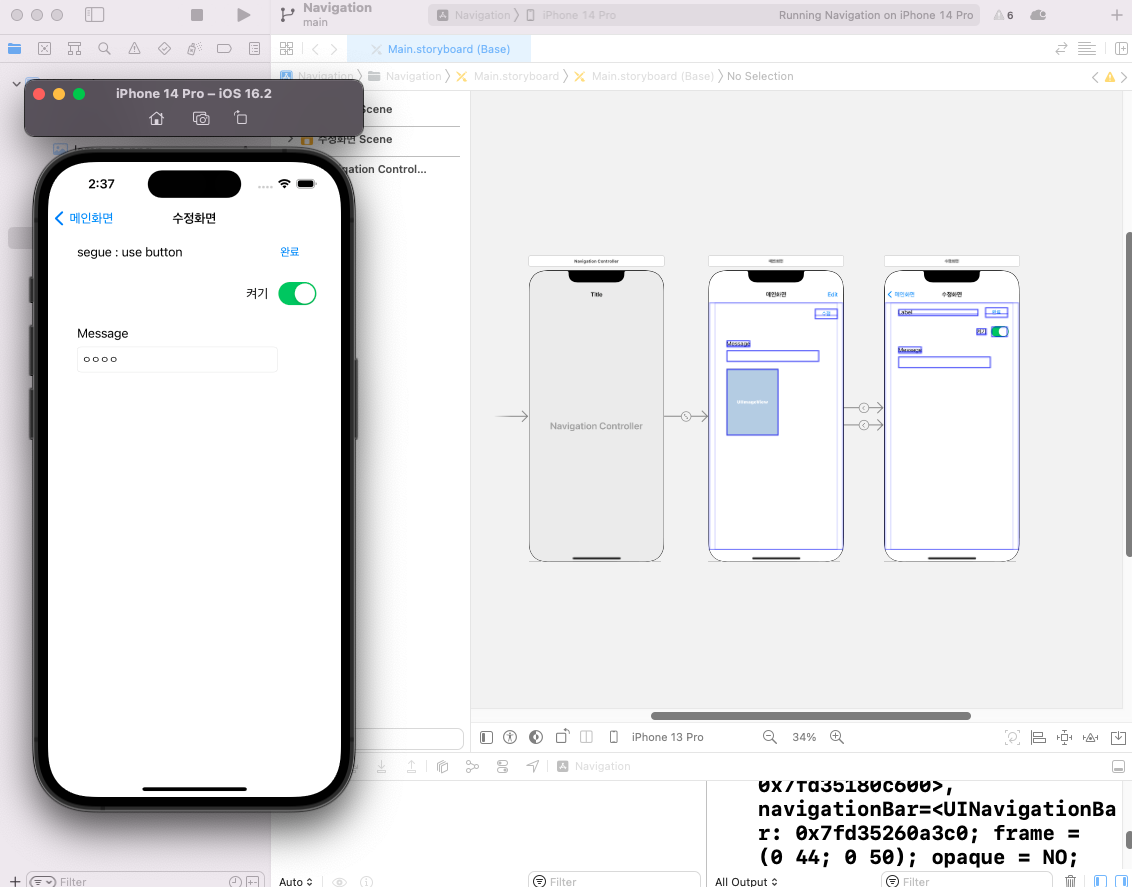
네비게이션 컨트롤러
테이블 뷰
탭바
이 세 가지가 복잡한 앱을 만들 때 필수적으로 사용하는 컨트롤러들이다.
아이폰 앱을 만들 때 가장 많이 사용하는 컨트롤러나 기술은 머니?
UIViewController: 모든 화면의 기본이 되는 컨트롤러로, 사용자 인터페이스를 관리합니다.
UITableView: 리스트 형식의 데이터를 표시할 때 많이 사용되는 컨트롤러입니다. 사용자 상호작용이 용이하며, 데이터의 동적 업데이트가 가능합니다.
UICollectionView: 격자 형식으로 데이터를 표시할 수 있는 컨트롤러로, 다양한 레이아웃을 지원합니다.
UIStackView: 자동 레이아웃을 쉽게 관리할 수 있도록 도와주는 컨트롤러로, 뷰의 정렬과 크기 조정을 간편하게 처리할 수 있습니다.
MapKit: 지도 관련 기능을 구현할 때 사용하는 프레임워크로, 위치 기반 서비스나 지도 표시를 지원합니다.
Core Data: 데이터 저장 및 관리를 위한 프레임워크로, 데이터베이스와 유사한 기능을 제공합니다.
Combine: 비동기 프로그래밍 및 데이터 흐름 관리를 위한 프레임워크로, 반응형 프로그래밍을 지원합니다.
SwiftUI: 최신 UI 프레임워크로, 선언형 방식으로 UI를 구성할 수 있어 코드의 가독성이 높아집니다.
AVFoundation: 오디오 및 비디오 관련 기능을 다룰 때 사용하는 프레임워크입니다.
Core Animation: 애니메이션 효과를 추가할 때 사용하는 기술로, UI 요소의 시각적 효과를 풍부하게 만들어줍니다.
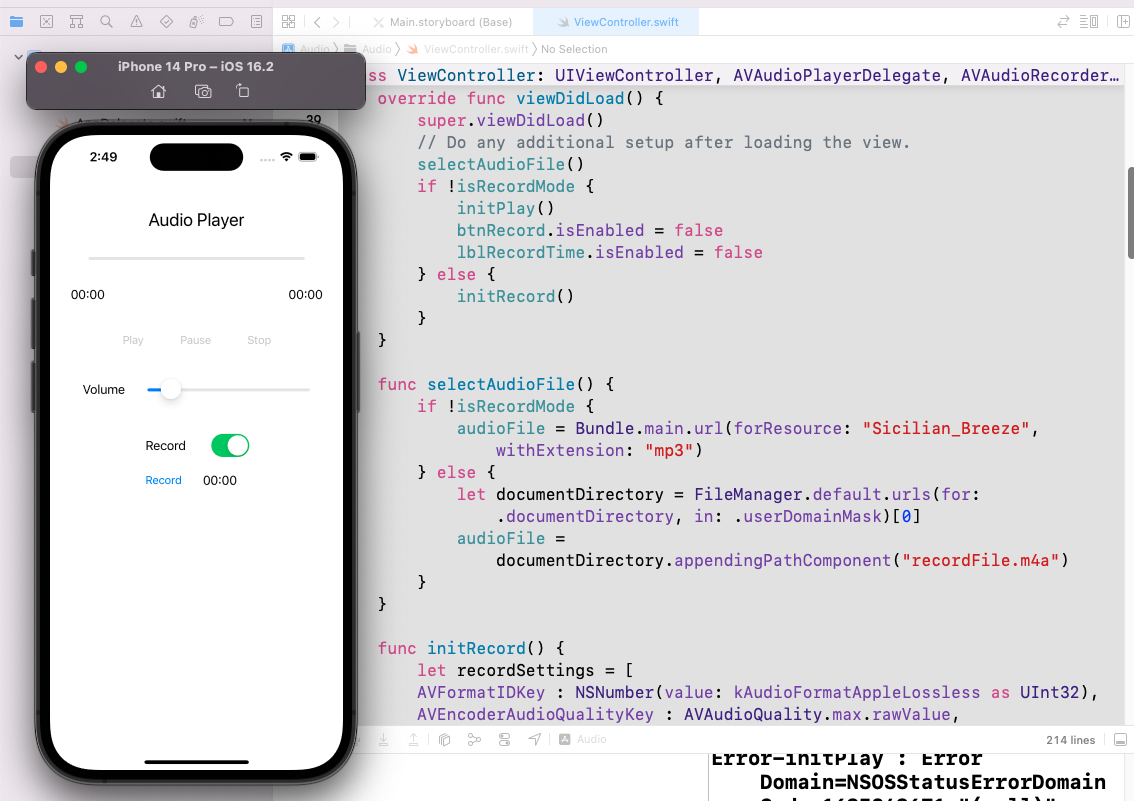
오디오 재생. 의외로 소스가 간단하다
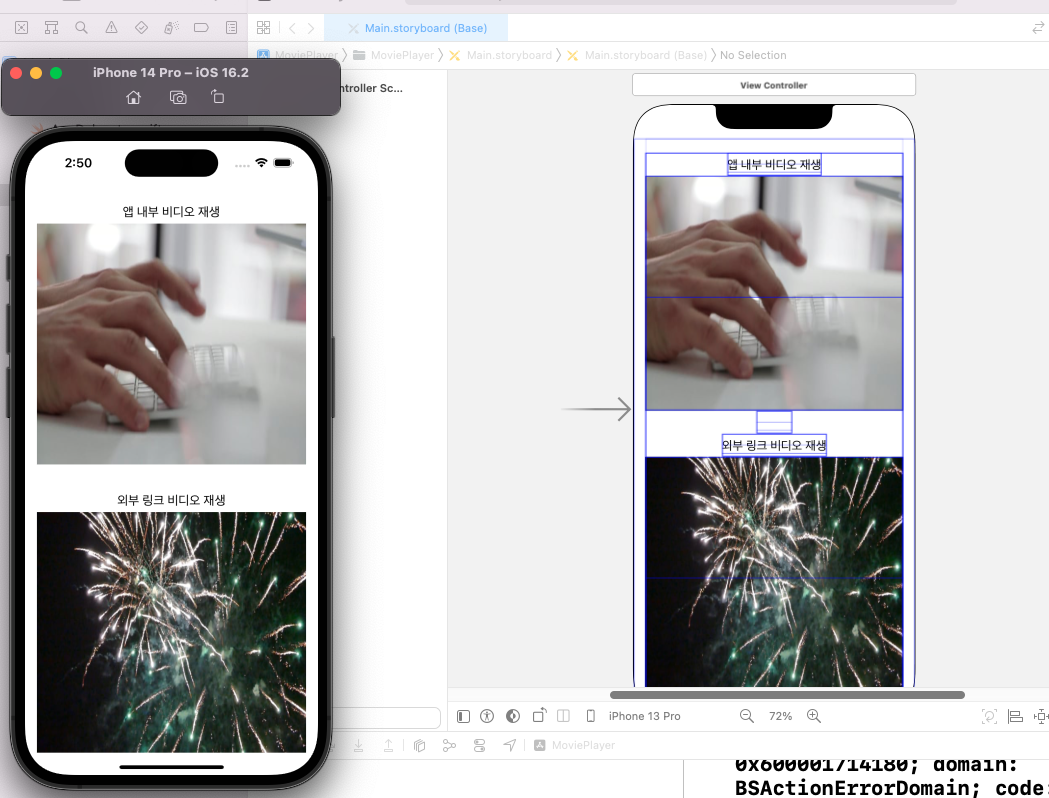
외부 링크 비디오, 내부 비디오 재생
//
//  ViewController.swift
//  MoviePlayer
//
//  Created by Ho-Jeong Song on 2021/11/26.
//

import UIKit
import AVKit

class ViewController: UIViewController {

    override func viewDidLoad() {
        super.viewDidLoad()
        // Do any additional setup after loading the view.
    }

    @IBAction func btnPlayInternalMovie(_ sender: UIButton) {
        // 내부 파일 mp4
        let filePath:String? = Bundle.main.path(forResource: "FastTyping", ofType: "mp4")
        let url = NSURL(fileURLWithPath: filePath!)

        playVideo(url: url)
    }

    @IBAction func btnPlayerExternalMovie(_ sender: UIButton) {
        // 외부 파일 mp4
        let url = NSURL(string: "https://dl.dropboxusercontent.com/s/e38auz050w2mvud/Fireworks.mp4")!

        playVideo(url: url)
    }

    private func playVideo(url: NSURL)  {
        let playerController = AVPlayerViewController()

        let player = AVPlayer(url: url as URL)
        playerController.player = player

        self.present(playerController, animated: true) {
            player.play()
        }
    }
}
//
// ViewController.swift
// TapTouch
//
// Created by Ho-Jeong Song on 2021/12/01.
//
import UIKit
class ViewController: UIViewController {
@IBOutlet var txtMessage: UILabel!
@IBOutlet var txtTapCount: UILabel!
@IBOutlet var txtTouchCount: UILabel!
override func viewDidLoad() {
super.viewDidLoad()
// Do any additional setup after loading the view.
}
override func touchesBegan(_ touches: Set<UITouch>, with event: UIEvent?) {
let touch = touches.first! as UITouch
txtMessage.text = "Touches Began"
txtTapCount.text = String(touch.tapCount)
txtTouchCount.text = String(touches.count)
}
override func touchesMoved(_ touches: Set<UITouch>, with event: UIEvent?) {
let touch = touches.first! as UITouch
txtMessage.text = "Touches Moved"
txtTapCount.text = String(touch.tapCount)
txtTouchCount.text = String(touches.count)
}
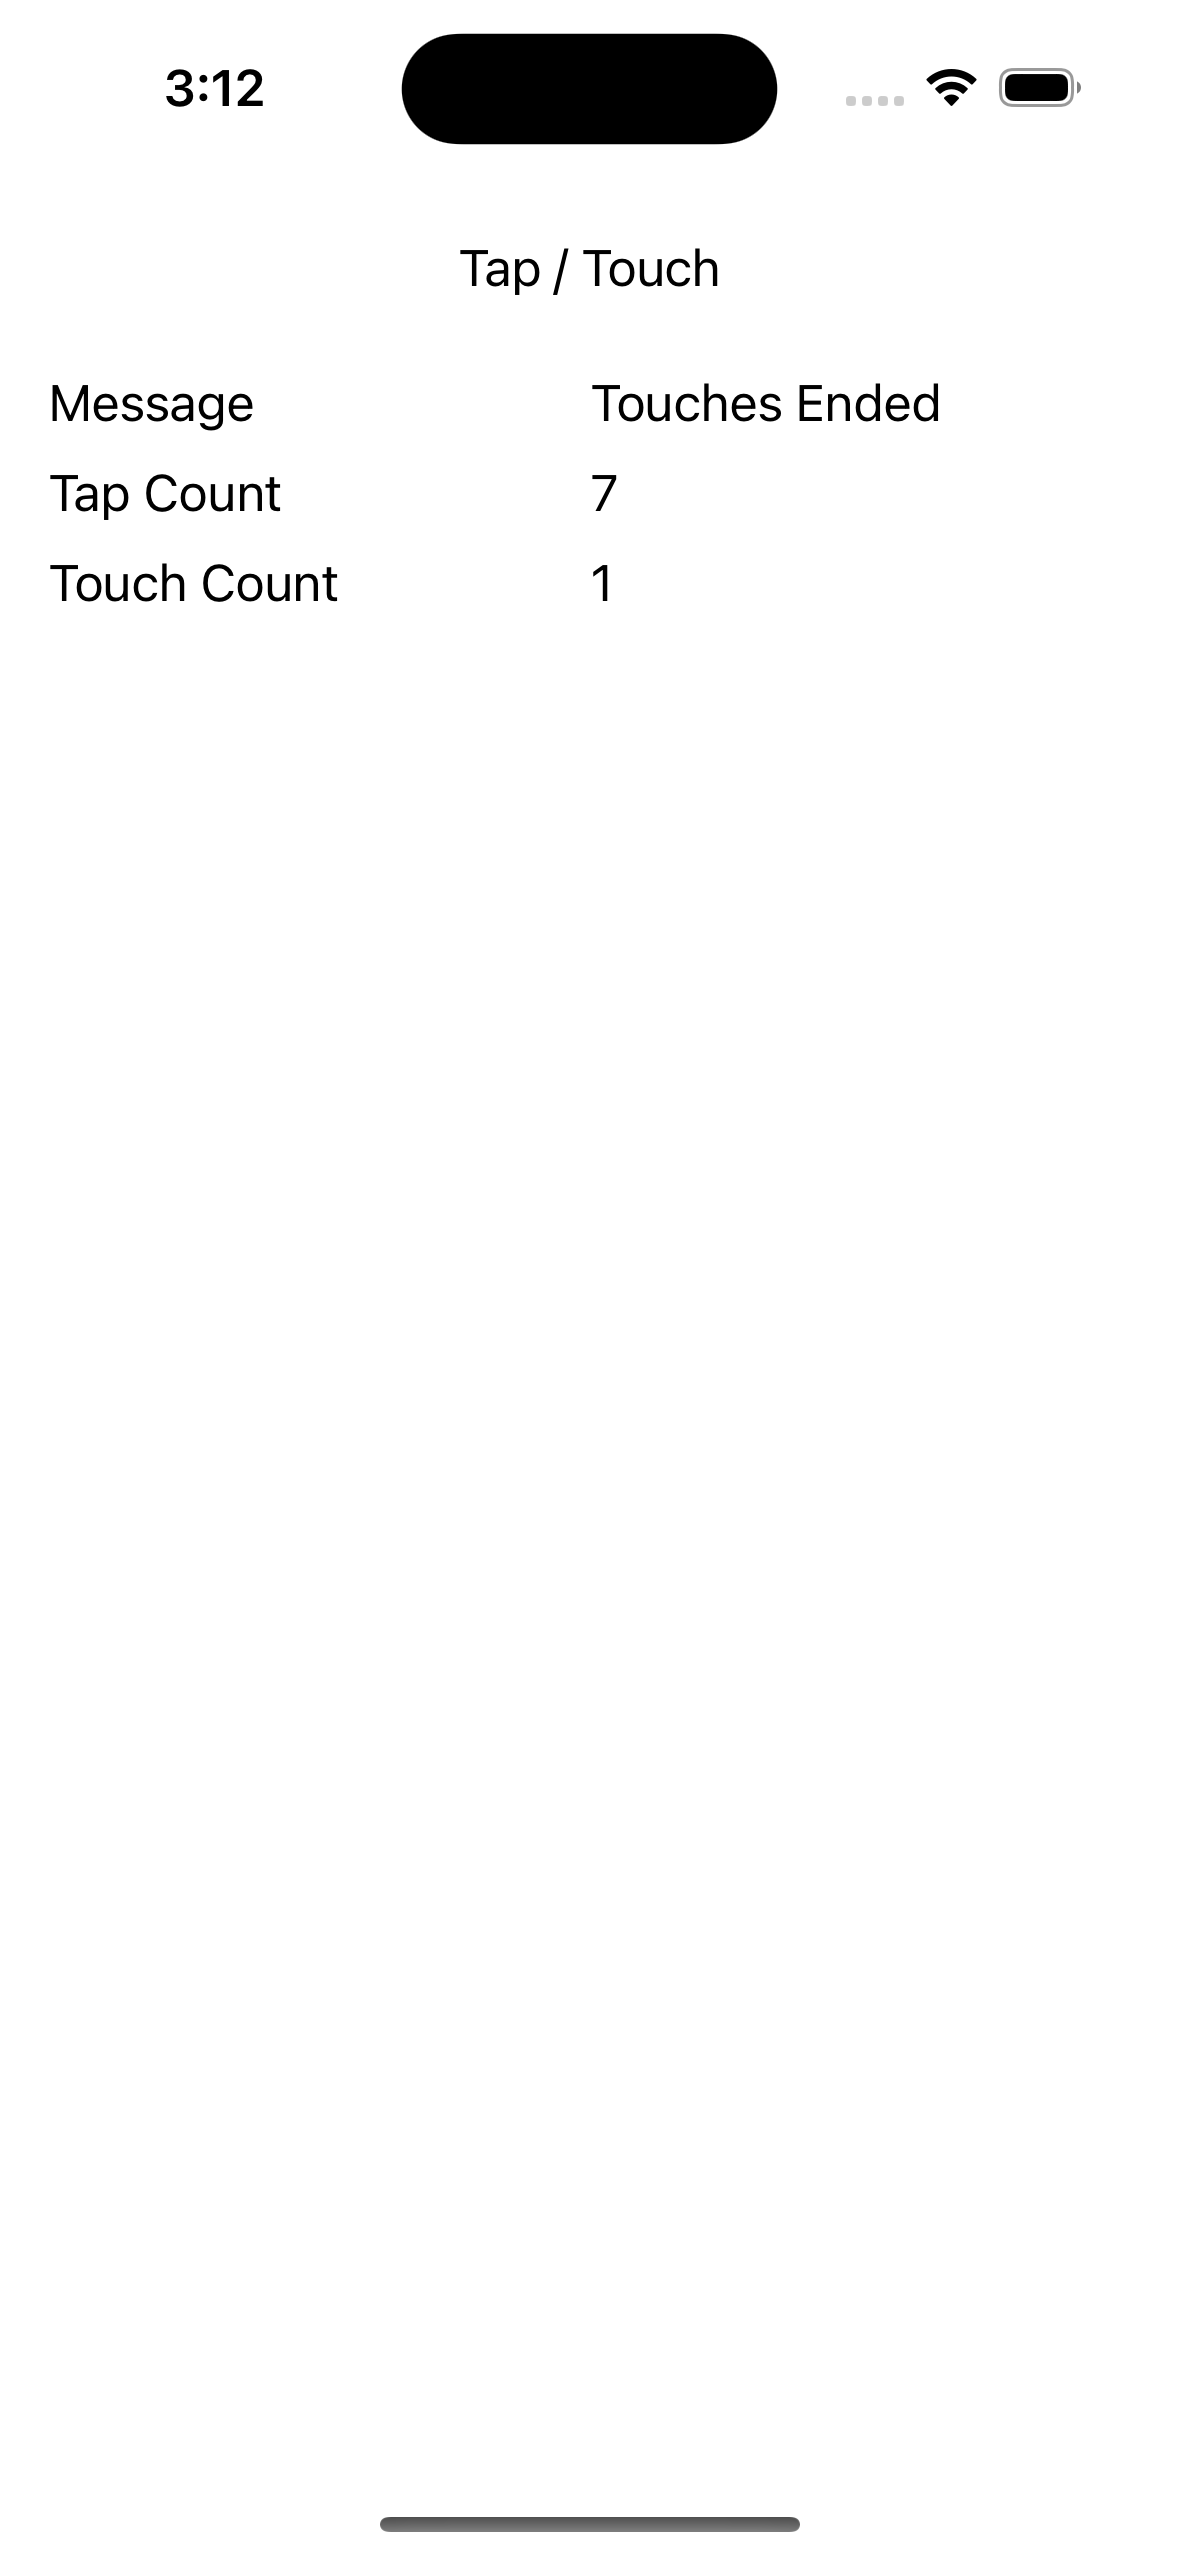
override func touchesEnded(_ touches: Set<UITouch>, with event: UIEvent?) {
let touch = touches.first! as UITouch
txtMessage.text = "Touches Ended"
txtTapCount.text = String(touch.tapCount)
txtTouchCount.text = String(touches.count)
}
}

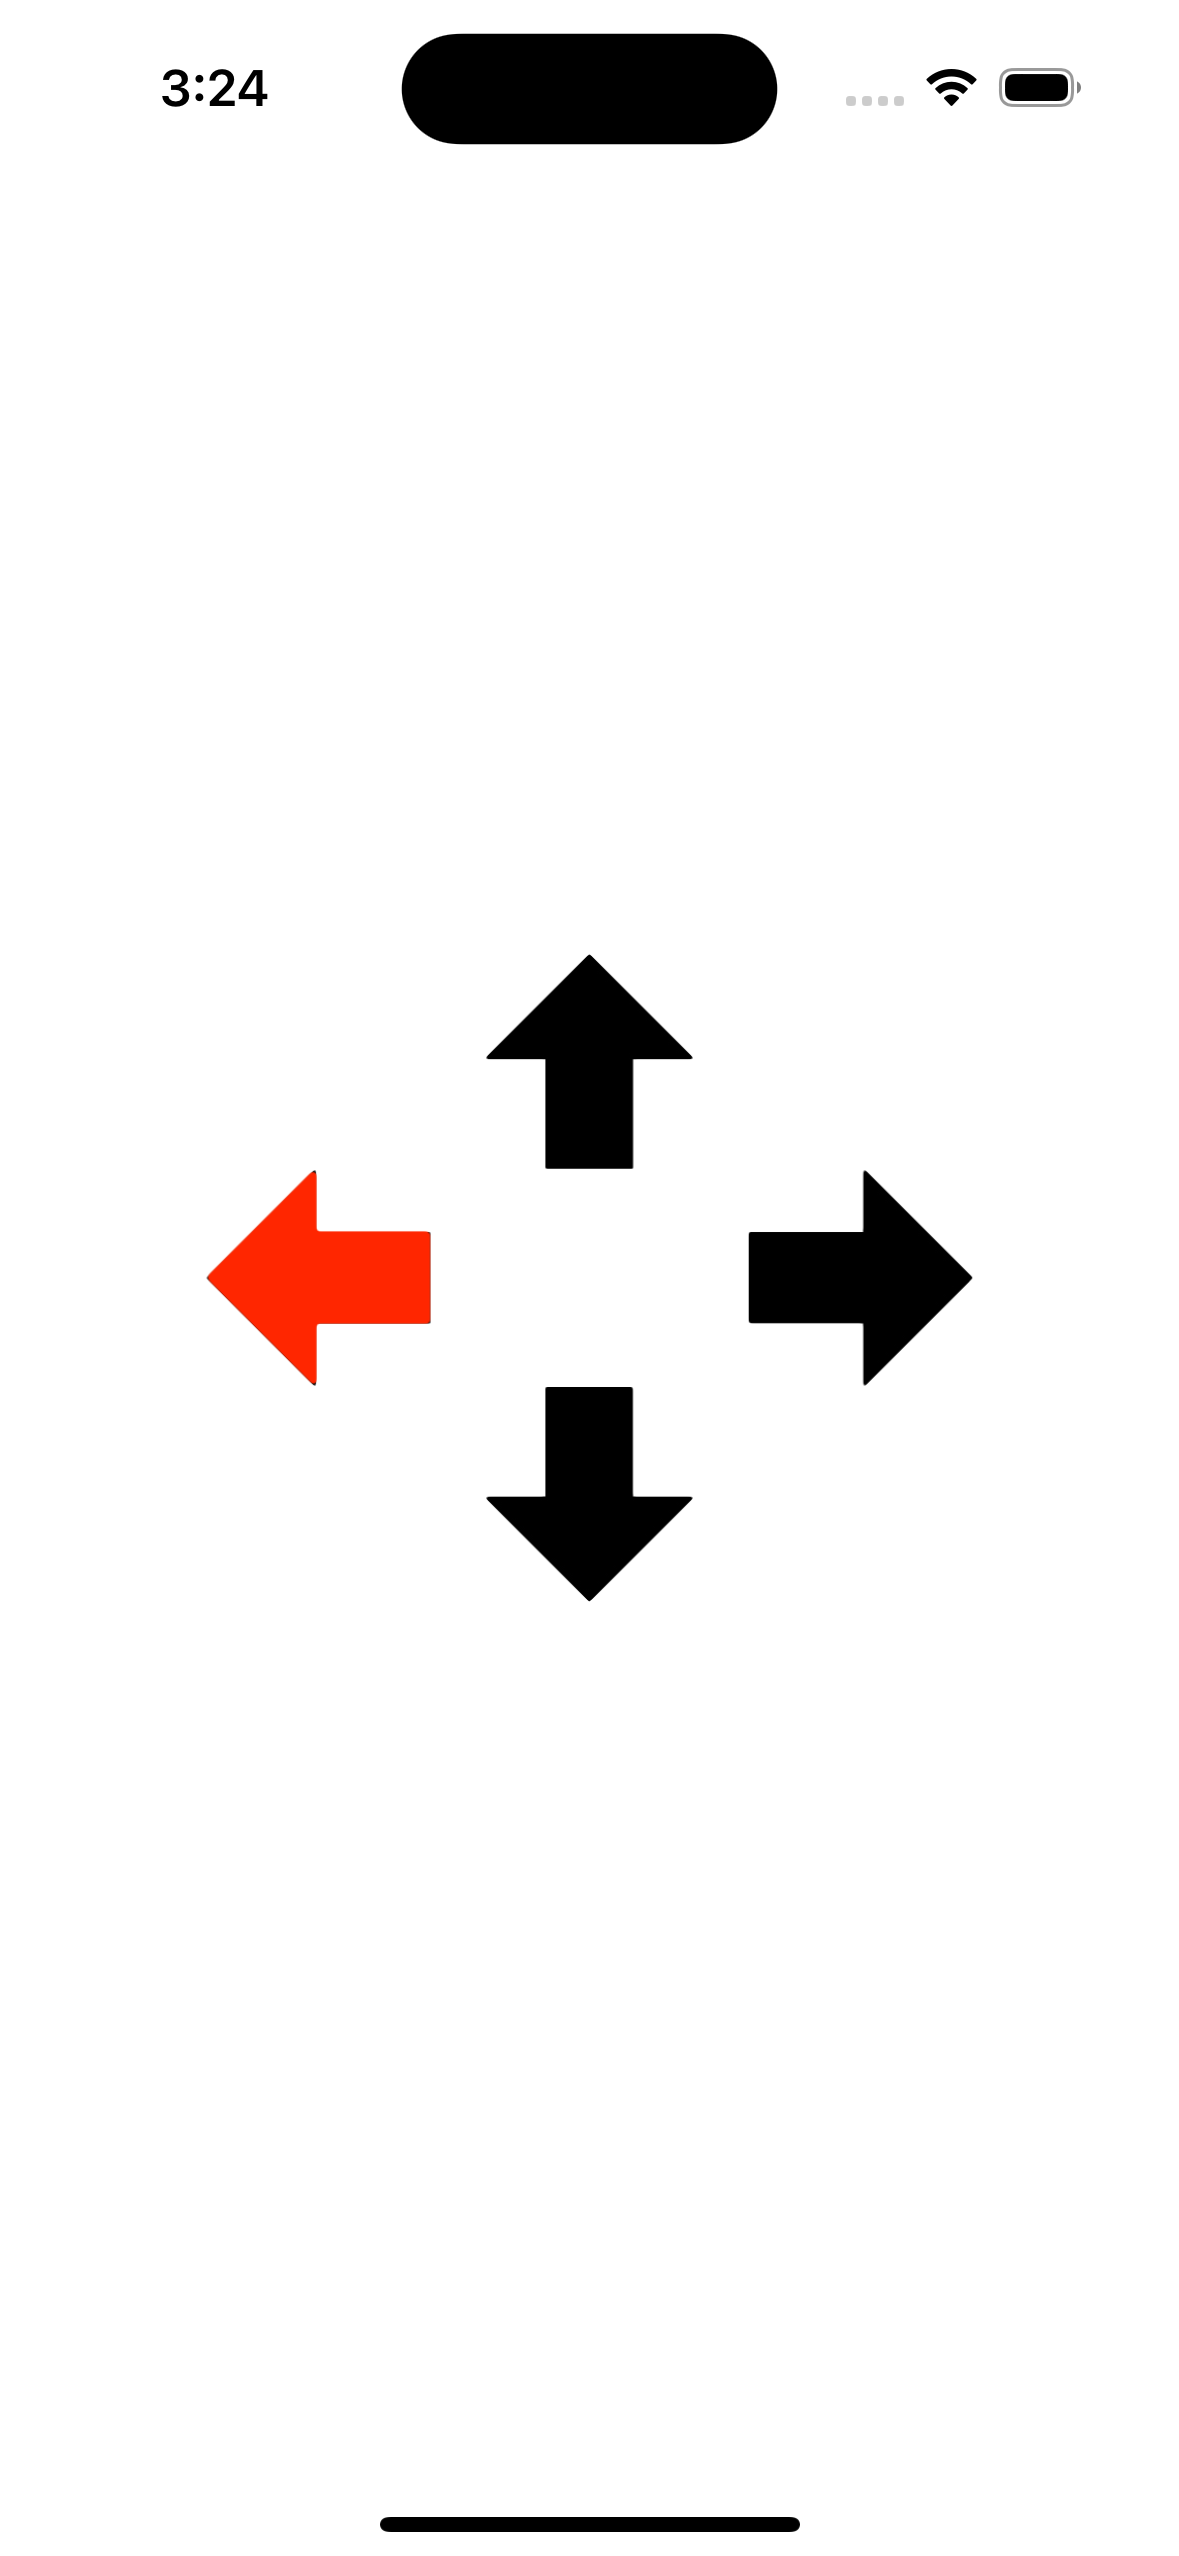
스케치 하는 앱.
//
//  ViewController.swift
//  Sketch
//
//  Created by Ho-Jeong Song on 2021/12/01.
//

import UIKit

class ViewController: UIViewController {
    @IBOutlet var imgView: UIImageView!
    @IBOutlet var colorPicker: UIPickerView! // 색상 선택기
    @IBOutlet var lineWidthSlider: UISlider! // 선 두께 조절 슬라이더
    @IBOutlet var btnUndo: UIButton! // Undo 버튼

    var lastPoint: CGPoint!
    var lineSize: CGFloat = 2.0
    var lineColor = UIColor.red.cgColor
    var drawings: [UIImage] = [] // 그림을 저장할 배열

    override func viewDidLoad() {
        super.viewDidLoad()
        // 초기 설정
        lineWidthSlider.value = Float(lineSize)
    }

    @IBAction func btnClearImageView(_ sender: UIButton) {
        imgView.image = nil
        drawings.removeAll() // 그림 초기화 시 배열도 비우기
    }

    @IBAction func lineWidthChanged(_ sender: UISlider) {
        lineSize = CGFloat(sender.value) // 슬라이더 값에 따라 선 두께 변경
    }

    @IBAction func btnUndoPressed(_ sender: UIButton) {
        if !drawings.isEmpty {
            drawings.removeLast() // 마지막 그림 제거
            imgView.image = drawings.last // 마지막 그림을 imgView에 설정
        }
    }

    override func touchesBegan(_ touches: Set<UITouch>, with event: UIEvent?) {
        let touch = touches.first! as UITouch
        lastPoint = touch.location(in: imgView)
    }

    override func touchesMoved(_ touches: Set<UITouch>, with event: UIEvent?) {
        UIGraphicsBeginImageContext(imgView.frame.size)
        UIGraphicsGetCurrentContext()?.setStrokeColor(lineColor)
        UIGraphicsGetCurrentContext()?.setLineCap(CGLineCap.round)
        UIGraphicsGetCurrentContext()?.setLineWidth(lineSize)

        let touch = touches.first! as UITouch
        let currPoint = touch.location(in: imgView)

        imgView.image?.draw(in: CGRect(x: 0, y: 0, width: imgView.frame.size.width, height: imgView.frame.size.height))

        UIGraphicsGetCurrentContext()?.move(to: CGPoint(x: lastPoint.x, y: lastPoint.y))
        UIGraphicsGetCurrentContext()?.addLine(to: CGPoint(x: currPoint.x, y: currPoint.y))
        UIGraphicsGetCurrentContext()?.strokePath()

        imgView.image = UIGraphicsGetImageFromCurrentImageContext()
        UIGraphicsEndImageContext()

        lastPoint = currPoint
        drawings.append(imgView.image!) // 현재 그림 저장
    }

    override func touchesEnded(_ touches: Set<UITouch>, with event: UIEvent?) {
        UIGraphicsBeginImageContext(imgView.frame.size)
        UIGraphicsGetCurrentContext()?.setStrokeColor(lineColor)
        UIGraphicsGetCurrentContext()?.setLineCap(CGLineCap.round)
        UIGraphicsGetCurrentContext()?.setLineWidth(lineSize)

        imgView.image?.draw(in: CGRect(x: 0, y: 0, width: imgView.frame.size.width, height: imgView.frame.size.height))

        UIGraphicsGetCurrentContext()?.move(to: CGPoint(x: lastPoint.x, y: lastPoint.y))
        UIGraphicsGetCurrentContext()?.addLine(to: CGPoint(x: lastPoint.x, y: lastPoint.y))
        UIGraphicsGetCurrentContext()?.strokePath()

        imgView.image = UIGraphicsGetImageFromCurrentImageContext()
        UIGraphicsEndImageContext()

        drawings.append(imgView.image!) // 현재 그림 저장
    }

    override func motionEnded(_ motion: UIEvent.EventSubtype, with event: UIEvent?) {
        if motion == .motionShake {
            imgView.image = nil
            drawings.removeAll() // 흔들기로 지우기 시 배열도 비우기
        }
    }
}
무엇을 참고하시나요 ? 라고 물어본다면 공식문서. 라고 대답해야 한다.

import Foundation 을 써야한다는 것을 알기!
스위프트에서는 클래스보다 구조체를 더 많이 사용한다
import Foundation
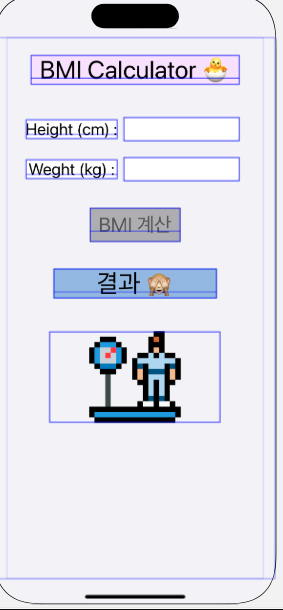
class BMI {
var weight : Double
var height : Double
init(weight:Double, height:Double){
self.height = height
self.weight = weight
}
func calcBMI() -> String {
let bmi=weight/(height*height*0.0001)// kg/m*m
let shortenedBmi = String(format: "%.1f", bmi)
var body = ""
if bmi >= 40 {
body = "3단계 비만"
} else if bmi >= 30 && bmi < 40 {
body = "2단계 비만"
} else if bmi >= 25 && bmi < 30 {
body = "1단계 비만"
} else if bmi >= 18.5 && bmi < 25 {
body = "정상"
} else {
body = "저체중"
}
return "BMI:\(shortenedBmi), 판정:\(body)"
}
}
var han = BMI(weight:62.5, height:172.3)
print(han.calcBMI())
클래스로 만들어서 bmi 를 계산하는 소스이다
import Foundation
let weight = 60.0
let height = 170.0
let bmi = weight / (height*height*0.0001) // kg/m*m
let shortenedBmi = String(format: "%.1f", bmi)
var body = ""
if bmi >= 40 {
 body = "3단계 비만"
} else if bmi >= 30 && bmi < 40 {
 body = "2단계 비만"
} else if bmi >= 25 && bmi < 30 {
 body = "1단계 비만"
} else if bmi >= 18.5 && bmi < 25 {
 body = "정상"
} else {
 body = "저체중"
}
print("BMI:\(shortenedBmi), 판정:\(body)")
함수로 사용하는 소스이다.
어떤 것을 사용해도 관계는 없지만 첫 번째 소스를 사용한다.
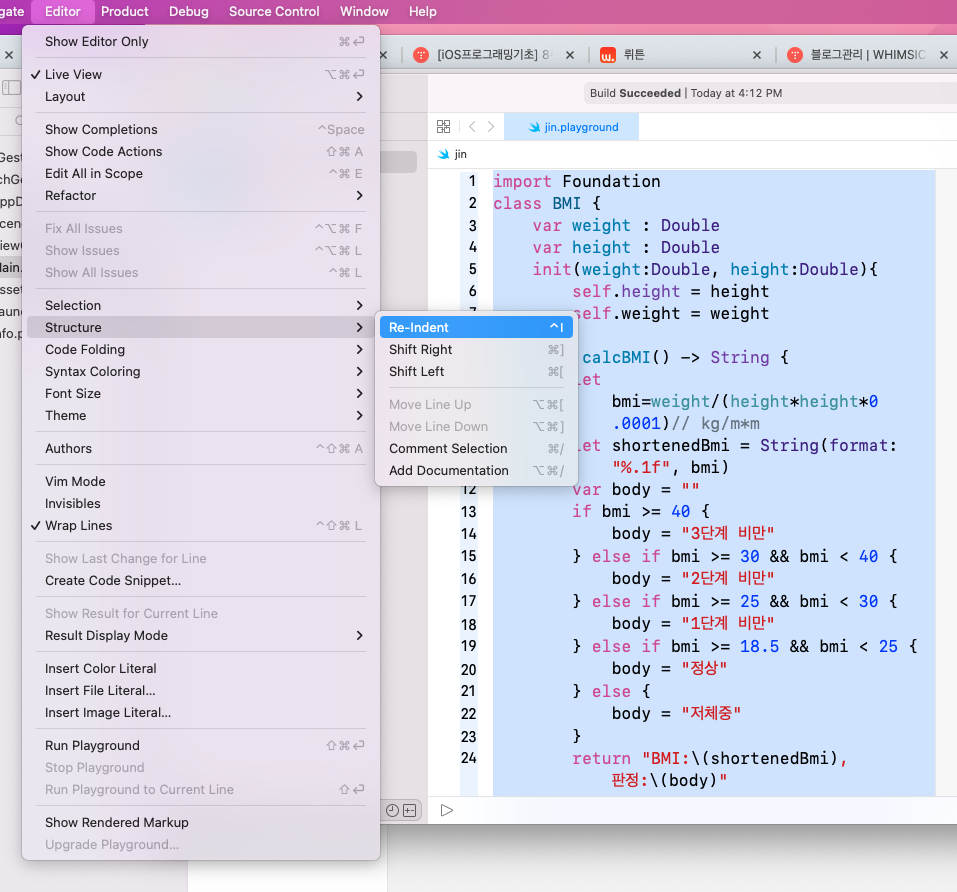
소스 정렬하는 방법
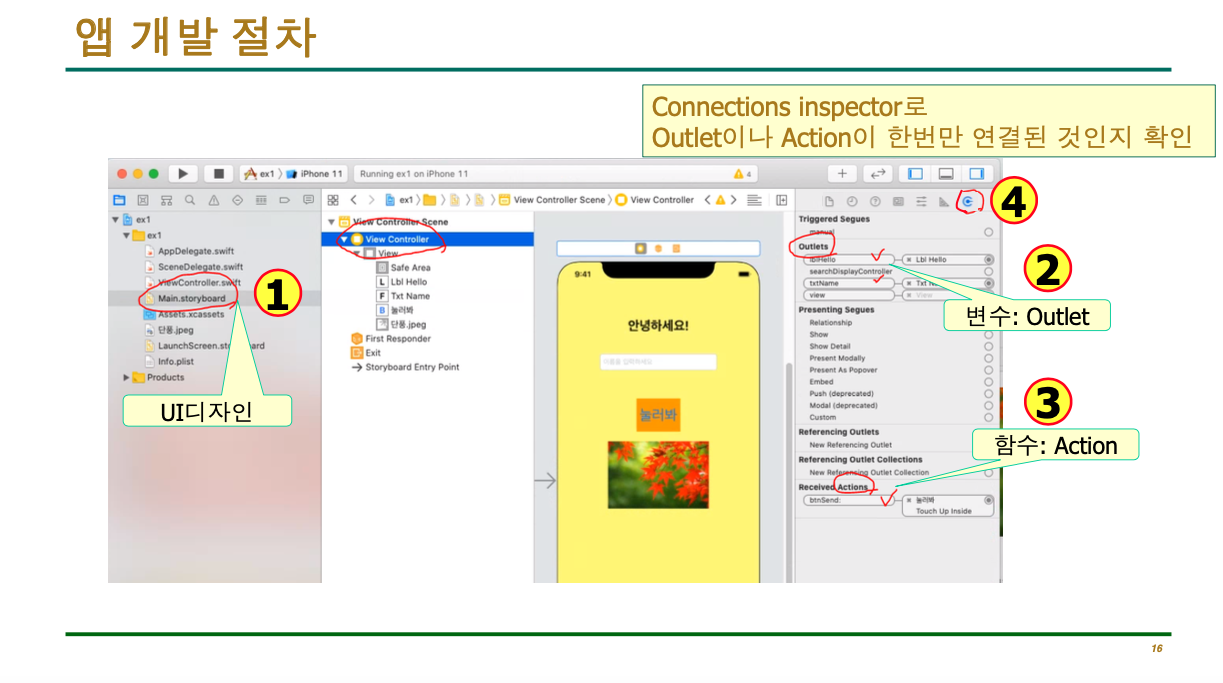
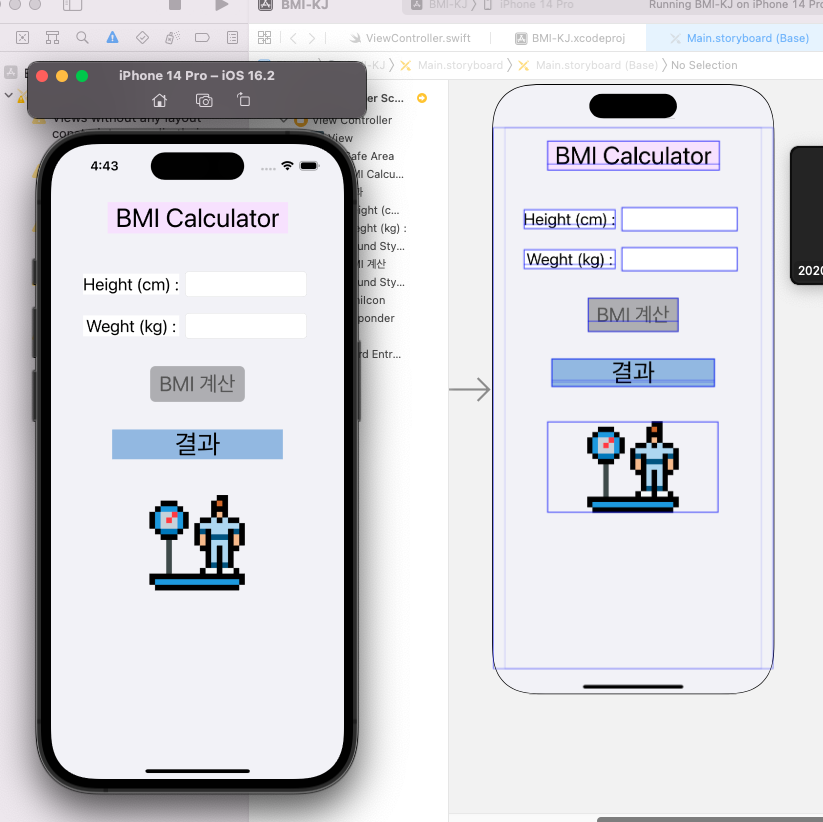
앱 개발 절차이다.
이미지는 이곳에 넣어주는것이좋다.
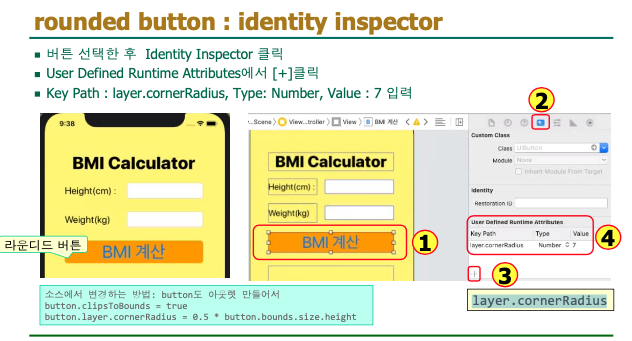
네모 둥글게 하는 방법
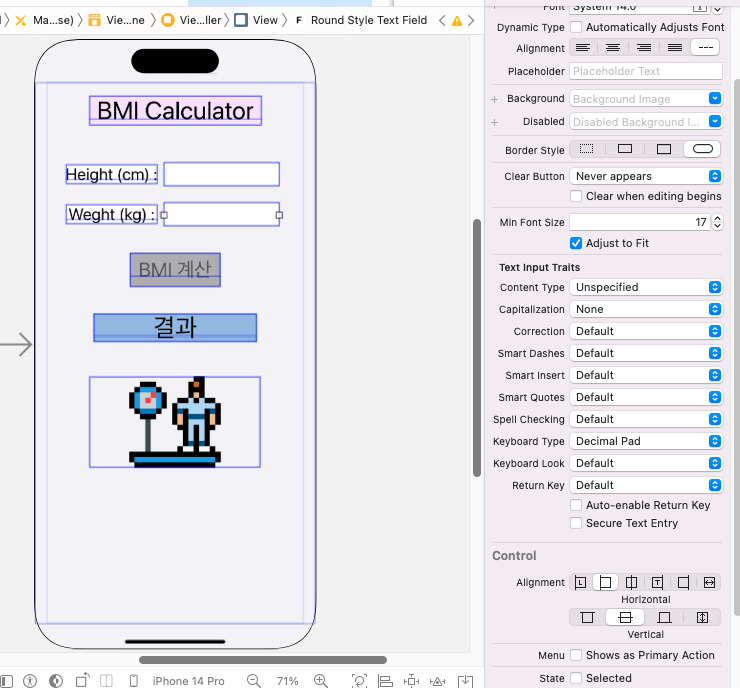
키보드 타입 설정.
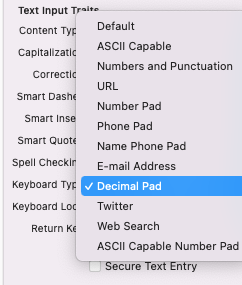
숫자만 필요할 때는 Decimal Pad 를 사용한다 (10진수 숫자만 있는 키보드)
어떤 키보드 타입을 사용하는 것이 좋을 지는 공식문서 찾아보면 된다.
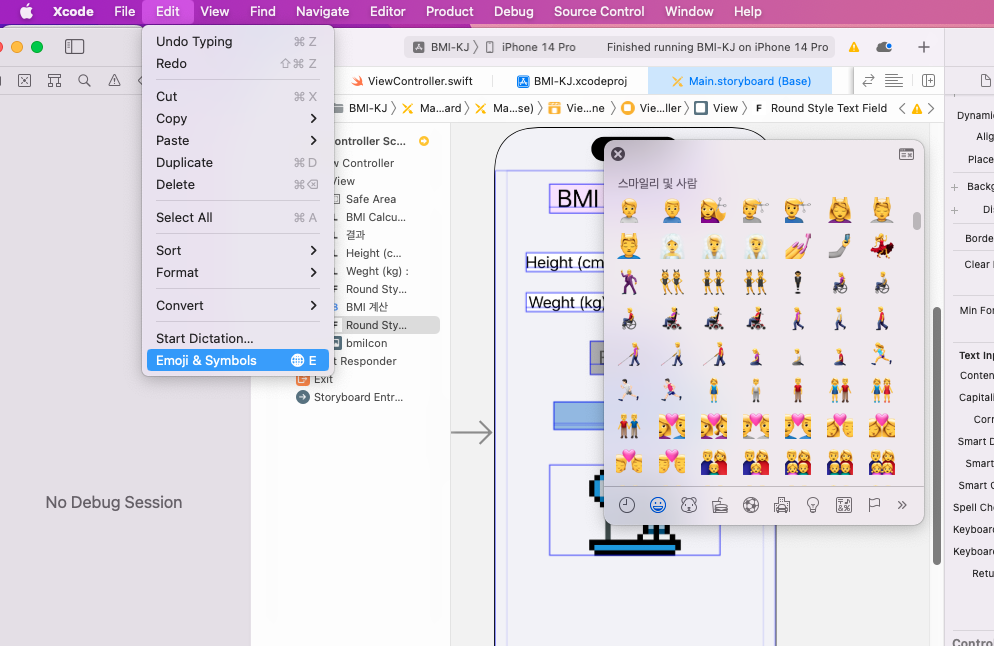
이모지를 넣을 수도 있다
여기까지 완성한 부분을 과제에 제출한다.